When you have a mind to work with beaded fabrics you essentially have two extremes: You can bead the fabric yourself and plan out the placing and spacing of each bead and sequin relative to the style lines or you can stab two pieces of decorated fabric together under the machine, ignore the cries of your needle as it navigates over, around, between, and through the beads and sequins (Seriously: you may just as well use a stapler and call it a day).
There are ways to navigate between these two extremes, though; the thinking sewer will smartly travel this path if they want the look of a more custom beading job without the weeks or months of labor that couture beading could take for someone otherwise employed and busy with a life.
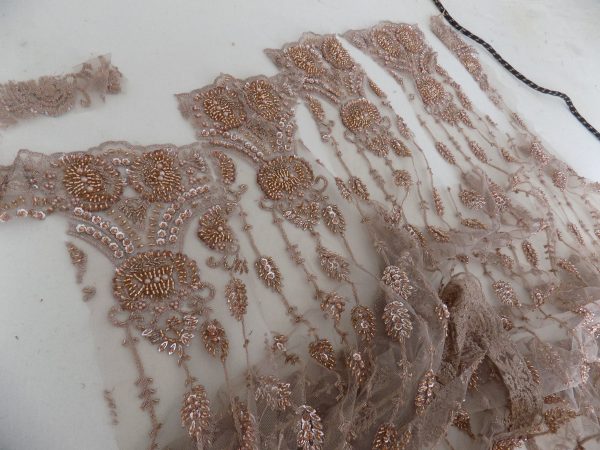
Verena found this beautiful beaded delight in bronze and pink tones for her upcoming wedding dress. The fabric has a scalloped selvage edge that is heavily embroidered, sequined, and beaded and an opposing scalloped selvage edge that is a little more subdued. As she worked up the base of the bodice, we thought it was a good time to take a step back and talk about your options as a sewer when you are sewing beaded fabrics.

Couture properly understood would have you tracing the pattern pieces out onto a base fabric after having transferred the pattern shape. This requires proper fitting to develop the pattern as well as proper placement on the yardage. The pattern pieces are then beaded onto the base fabric with a needle or tambour hook. After the garment is sewn, you can fill in the odd bead or sequin where it looks a little empty and there you go. This is the best way to assure you are going to get exactly what you want and keeps the sequins out of your way and where they need to be. It also takes time, patience, and skill.
We are working on a separate post about tambour beading and techniques, but there is an artist in Derby, UK, who does beautiful work. His name is Simon Henry and you can find him on Instagram. You can see how beading and embellishment is done from this custom perspective:

Verena has patience and skill, but time is not on our side. The garment is due to be worn on 2 September, so all of our construction and final alterations have a deadline for 16 August.
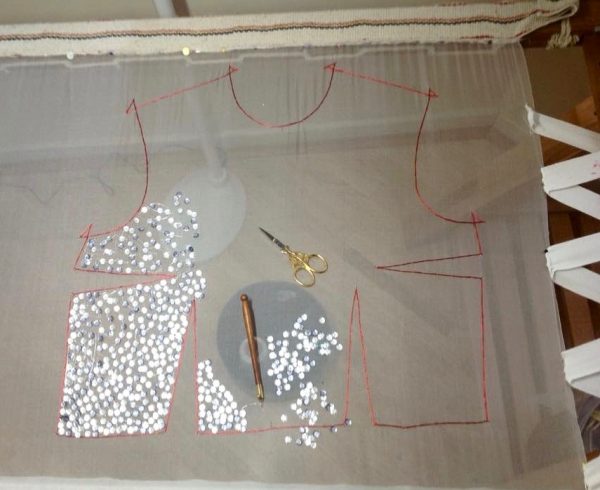
The bodice she is using as the base is a straightforward strapless bodice that we’ve pulled from the pattern archives at the workrooms. It had already been fitted to her shape through a couple of muslins.
Once we had the fabric in hand, we got to work. The first thing you want to do is lay out the pattern pieces on the yardage and get the placement right. Because we are not going with a completely custom beading job, we are looking for the patterns to blend pleasantly and will bead over them once the bodice is constructed. After the pieces are placed and cut, the sequins and beads are removed from the seam allowances and all of the loose beads and sequins anchored with thread around the perimeter of the piece.
The pieces are then interlined and sewn normally with a zipper foot to account for the excess volume of the fabric that is beaded outside the seamline.
Now the fun starts.
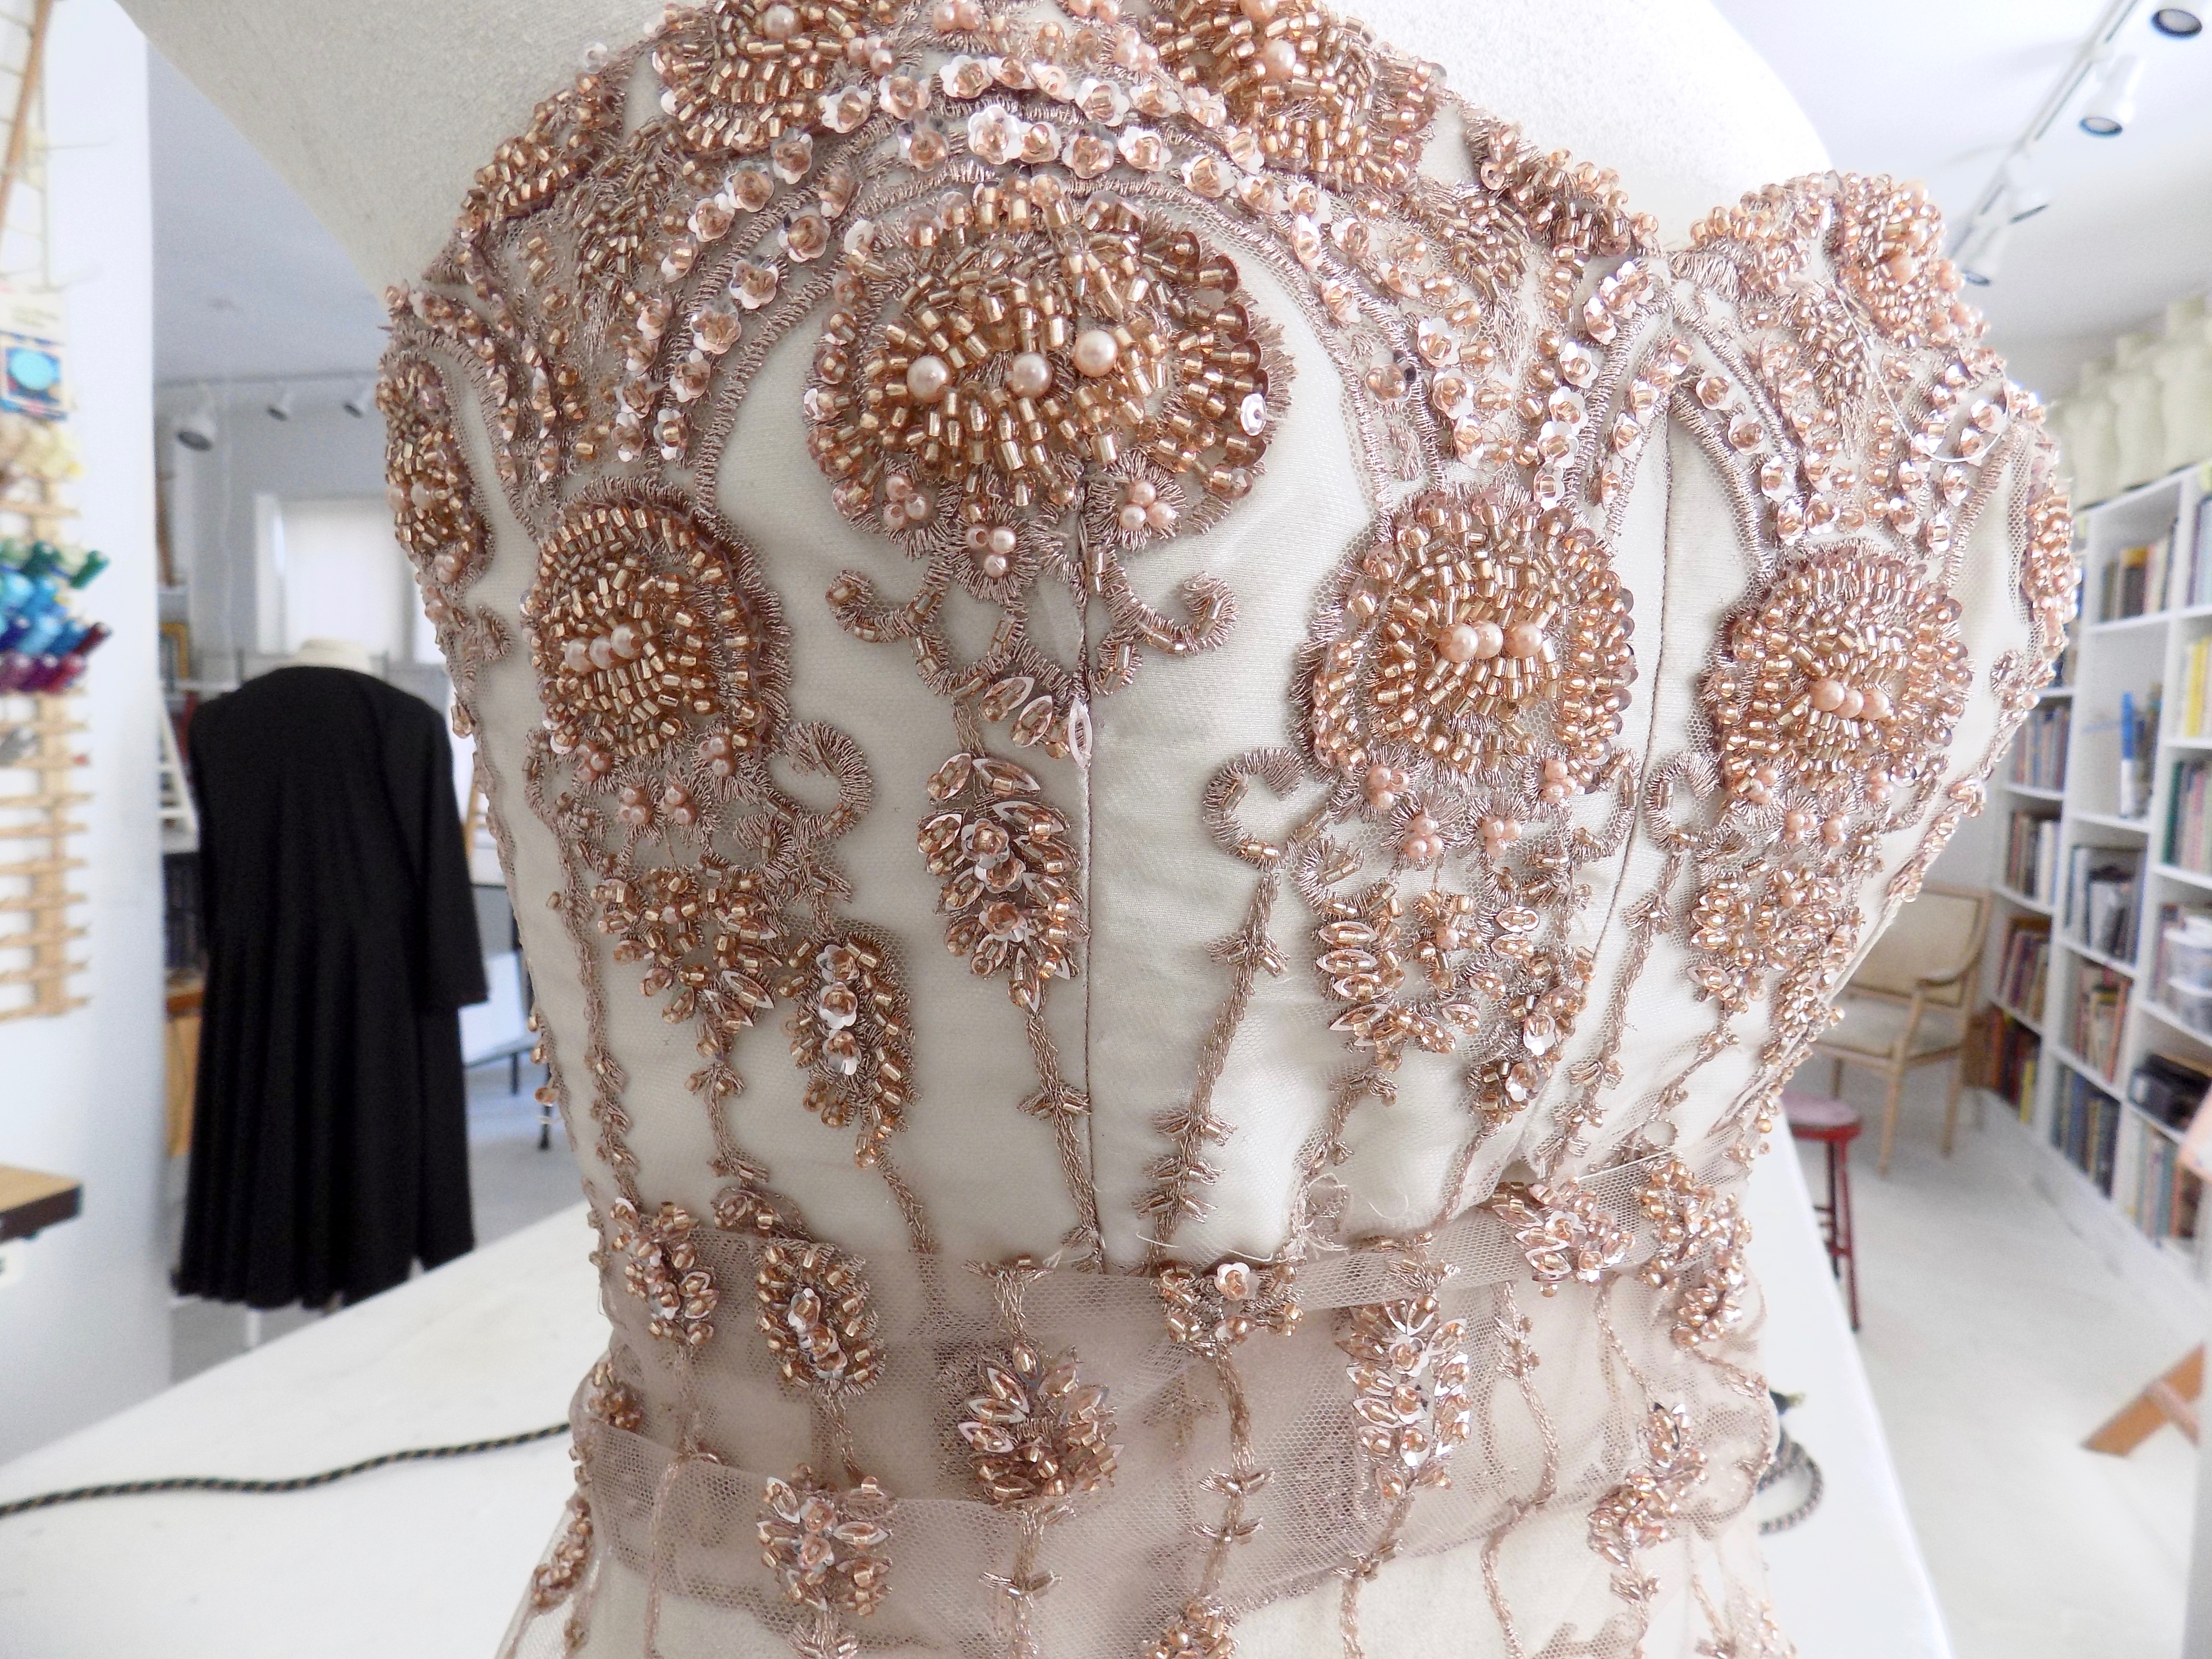
Once the pieces are sewn, you want to go through the process of re-beading so that the shapes of the bodice sections are as invisible as possible. This little nubbin of a blog post should help you see what we mean.
After the pieces are sewn, you want to intelligently reconstruct the look of the beading. You will never be able to overlay the exact same pattern (which is why there is a strong argument for doing it from scratch like Simon Henry does), but you should be able to thoughtfully blend it into something special. Let’s look at a few pictures with commentary working from the center front to the center back:
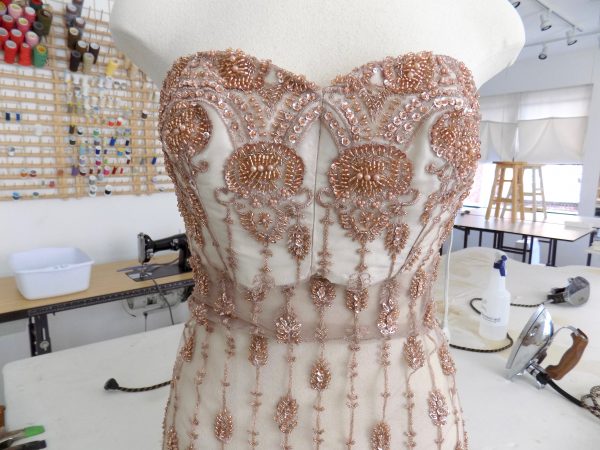
Look at the balance in the pattern. The large lower medallions don’t fall too high or low and the higher medallions don’t fall directly on the fullest part of the bust. You get the roundness and fullness of the bust without the “Look at these” effect of a medallion directly on the highest point of the bust.
Laying out the pattern like this also allows the arches to come to a nice completion without being truncated and allows the arches that have to be cut in the center front to form a nice gothic arch that looks right. Properly speaking, the spandrels below the medallion would be balanced out by embroidering the piece so that it is symmetrical. This is one of those things that most people won’t notice, but those who do, do.

In this detail you can see that she is carrying the floret sequins with their terminal bead up and over the top of the arch to blend the pattern into the seam.

You can’t avoid the medallion gaining some area visually as it crosses the princess seam at the upper bust, but you can do a little in-fill to clean it up. Below the medallion we are going to carry those marquise sequins over the seam and into the other vine left to right.

This is where the seam worked out well. She carried the floret and bead over and the seam is barely visible.

The side right seam with the medallion filled in and work starting on the vines below it. The spandrel was severed in the cutting, but with a few beads and a couple of marquise sequins on the right (front) side of the seam, this will blend well too.

So just some early morning thoughts for you guys the next time you are working with beaded fabrics. We’ll be writing more about this dress over the course of the next few weeks as she develops more of the pieces and starts to put them together into something more functional, but she is off to a solid start.